Installation
You get two .zip files from the download location. One file contains the grunge textures. Just unzip them into a separate folder.
The first idea was to supply these textures in the Addon. But Blender installs Addons in a version specific folder. When updating Blender to a new version the path to the Addon changes, which means, scenes created with the older Blender version have a wrong path to these textures.
The second file contains the plugin. Install it as other plugins. In Blender:
Edit > Preferences > Addons > Install.
Than enable it, now you can adjust the path to the grunge library and your PBR libraries. In case you want use Extreme PBR‘s library, enable the toggle close to the folder button like in the video below.
Primary for development reasons, but comes very handy: After configuration of both paths, Material Wizard stores them in .material-wizard.json in your home folder. If the configuration of those paths get lost (e.g. Addon disable/enable or update), information from this file is used. So don’t wonder if textures can be found, even if the path in the configuration is empty.
User grunge maps
Starting with v1.2 you can add your own grunge maps, to use them as well. Just copy them to the grunge folder. Attention! There is a single naming convention. User grunge map file names should not start with “grunge”. Files like this will be handled differently.
Overview
To create materials, open Material Wizard Node Tree in one of Blenders views.
For every material, a Material Generator must be added. This creates a material in background, which can be used as any other material in Blender, just assign it to one or more objects. The node offers a comfortable way to do this as well. Clicking on Assign to selected Objects, replaces the material in all slots of selected objects with the one from the node. If an object has no material applied, a new slot is created and the material is linked.
Differences to Blenders Shader Nodes
Material Wizard has some features which are focused on efficiency and usability. They may break with Blenders model of nodes, but they are very powerful.
Mixed Material Trees
It is possible to create a Material Wizard node tree for each material, but a nice way is to create multiple materials in a single node tree, so you can share nodes or partial node trees between Material Generators.
Quick Node Creation
Another feature is the quick node creation. Every input socket has a little button next to it, which is used to create a common node and automatically connect it to the respective socket. Upon clicking on the button, a little selector is opened next to it. The items available here are depending on the type of the socket.
Quick View
A different important feature is the quick view. Every output socket has three buttons next to it, each one displaying some kind of Eye symbol. When clicking on the right one, a node link from this socket to the Debug socket of Material Generators is created. Now you can see how this socket looks like (The connection is actually created to every Material Generator that has a material used by any of the selected objects). Those are familiar to Node Wrangler, it is identical to Ctrl-Shift LMB.
The ‘half Eye’-button does something similar, but only the left 50% of the object (X-Axis) shows the data from the socket, while the remaining part still displays what is connected to the Output socket of the Material Generator. This may be very useful when adjusting the sockets output.
The left (crossed out) Eye-button removes the link and resets the generated material to it’s Output.
Material Sockets have a special role. Left to the three Eye-buttons is a channel selector, where you can choose, which channel should be viewed.
Material Sockets
The orange colored sockets are special to Material Wizard. They transfer information of multiple material component channels (currently Diffuse, Specular, Metallic, Roughness, Normal, Alpha, Emission and Displace) from one node to the next. In Blenders shader editor, you have to link each channel one by one, which creates a lot works and reduces overview. Here it is just one connection.
There are nodes to split and recombine those channels, if this is a requirement.
Different UV map schemes
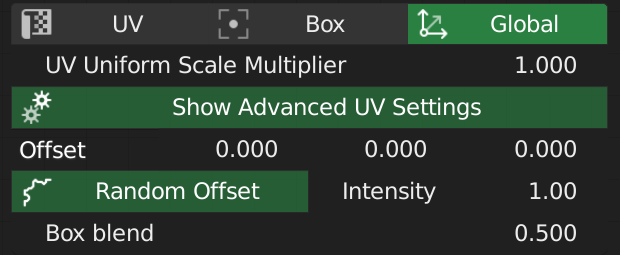
All texture based nodes have three different UV mapping options:
- UV: The default UVMap is used
- Box: The ‘Generated’ UV coordinates are used. All textures are set to ‘BOX’ projection and the box blend factor is adjustable directly in the node. So no UV’s are required, also useful for grunge maps.
- Global: Identical to ‘Box’, but the relative 3D location of each vexel to the objects position is used. This can be very useful. In the case of ‘Box’, if the bounding box of the the object has different dimensions in X, Y or Z axis, the texture is squeezed or stretched. Not in this mode, as the global space dimension is used.
In every mapping mode, a Uniform Scale Factor can be adjusted, which is very handy to scale the textures to the correct size.
Additionally, you can enable Random Offset, which shows an Intensity value. If enabled, the UV’s get an offset by Object Random x Intensity. So every object with the same texture has a slightly randomized UV mapping, which prevents equal looking objects.
As of version 1.1.0, the panel part has been restyled and controls for offset in X, Y and Z (Z in case of Box and Global mapping) has been added. By default, only the mapping type and the scale is visible. Clicking on Show Advanced UV Settings offers all options.
Panel
The panel has view features in this version, but this is just a starting point. To access it, press N-Key in the Material Wizard node tree to toggle the panel in the right side. Select Material Wizard from the tabs.
Fix Texture Paths
When transferring a .blend from one system to another, paths to textures are supposed to change, especially if systems have different operating systems. Clicking on this button forces Material Wizard to update the paths of textures in the Material from Textures, as well as the Grunge Map nodes, based on the image file name. All textures in the image library path (adjusted in the addon preferences) are scanned.
Technical background: The visualization on both mentioned nodes is a little bit tricky. Blender does not store the selected folder/image by name, but a numerical index. So Material Wizard is forced to create files named .material-wizard.json in each folder of your texture library, mapping images/folders to unique ID’s. Otherwise adding new folders or images to your library would select different entries on reload. It would be very complicated to impossible to hold those information consistent across systems. So Material Wizard stores the texture name as string in each node additionally. If you open the .blend on a new system (or switch to a new texture library path in preferences), the node detects that the original texture is different to the current selection. It show are warning on the nodes body in this case. Selecting Fix Texture Path scans all nodes in the current .blend a fixes the information to the new path. This only belongs to those two node types and is not a replacement to Blender’s built in ‘Find missing Files’-functionality!
Update nodes
This fixes a node tree that is created with an older version of Material Wizard. After clicking this button, store the file in the new version.
Open Manual
Nothing magic, just opens this page in a new tab of your default system browser.
Node Reference
This sections describes all nodes in detail.
Material Generator
The most important node. This creates a standard Blender material in background and updates it, if anything related in the node tree is modified.

The name of the generated material is show here, you can rename it.
The button Assign to selected Object does exactly this, sets all material slots of all selected object to this material (or creates one, if an object has none).
Displacement (v1.2): If enabled, the generated setup connects the displacement channel through a displacement node to the displacement input of the output material, so the object is ready for real displacement. This shows the Midlevel and Scale controls from the displacement node to control how displacement is done.
Everything connected to the Shader (named Output in v1.1) socket is how the material looks, while the Debug socket is used to view output of different sockets, as described here.
Material Composer
This node is useful to create a material (part) in the style of Blenders shader editor.
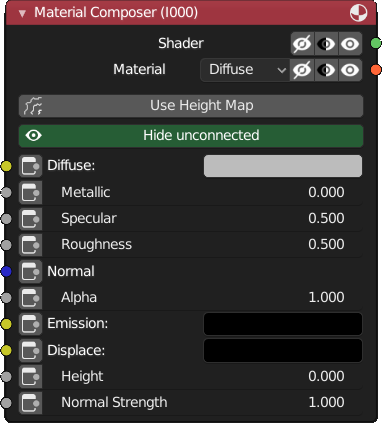
Each material channel can be adjusted individually. They are identical to the sockets of the Principled BSDF node and have the same default values. So best documentation is that from Blender. This node work well in combination the Material Splitter, so you may modify single material channels, while preserving others.
To switch between the use of normal and height maps, the toggle Use Height Map is used. If enabled, the Height socket is used. In this case, the node transforms the bump map into a tangent space normal map, so it can be mixed with normal maps.
The Normal Strength scales the intensity of the normal/height map, negative values invert the normal map’s direction.
The Hide unconnected toggle is useful to reduce the size of node in the tree.
Material Splitter
Splits a Material Socket into its separate channels.
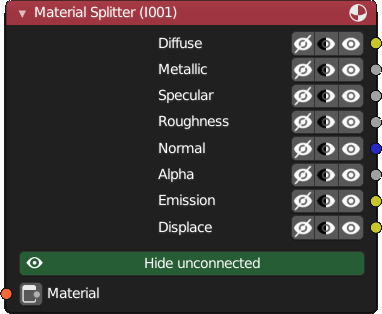
Not much to describe here, this node takes a composed material and separates it into single channels. Useful to modify single channels and subsequently recombine it using the Material Composer node for further processing.
The Hide unconnected toggle is useful to reduce the size of node in the tree.
Material from Textures
This node is used to automatically create a PBR shader from a set of textures.

Material Wizard scans your texture collection after configuration in the addon preferences. It assumes that your collection is sorted by kind of textures in subfolders to the root folder, e.g. Bricks, Stone, Wood, …
Following an excerpt how of the expected directory structure and it’s content:
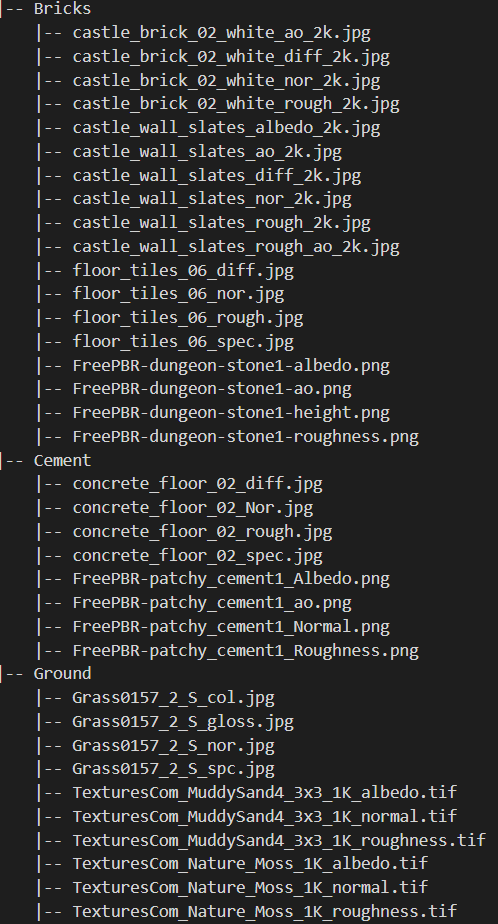
By selecting one of the subfolders in the drop-down box at the top of the box, this folder is scanned for PBR sets. Naming conventions from most texture sites are taken into account in this process. The scanner first looks for diffuse, color or albedo textures and subsequently searches for textures containing the other texture channels using the same base name of the diffuse map.
The selector showing the texture can be used to choose the texture set. Upon selection, the material is automatically updated. Here the diffuse/color/albedo map is shown. There’s a plan for future versions of Material Wizard to automatically create preview images for all sets and show this instead of the diffuse map.
The toggle Is DirectX Normal Map is useful, if the texture set has a DirectX instead an OpenGL compatible normal map. If selected, the node tree is modified, so the normal map is converted to the correct format.
Just below this toggle, UV settings can be adjusted. Take a look into section Different UV map schemes for details.
Following this are sockets for Hue, Saturation and Value. These are very handy inputs to adjust the diffuse channel using a grunge map or a mask, e.g. to add some dirt or random to maps, or just to quick adjust the map, so it matches to surrounding materials.
The final socket, Roughness Offset, is just an offset to the roughness channel. Reducing it, let some materials look some kind of wet. Plugging a mask to this socket may create the effect, parts of the material is wet.
Principled Shader
Transforms a Material socket to a Shader socket offering most of the Principled BSDF node controls.
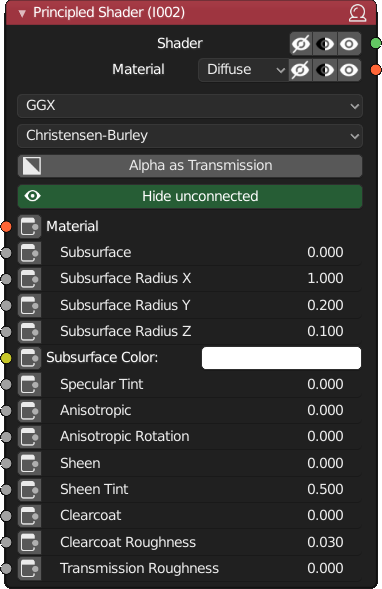
All nodes that have a Material output socket, have a Shader output socket as well, so in most cases, this node can be prevented. Those nodes internally have a Principled BSDF using default values on all other inputs. But in certain cases, full control is required. Use this node if needed.
All inputs are identical to the Principled BSDF and have the same default values. For a detailed description, look here.
Transparency is handled a bit different. If an alpha channel is supplied from the material input, the alpha input from Principled BSDF is used. Except if Alpha as Transmission is selected. In this case, the inverted alpha value is supplied to Transmission input, which is than a shader for glass or liquids. If enabled, the IOR can be selected from a list of common materials. If the required IOR material is not in the list, select User Value the be able to adjust the IOR value on your own. It’s better to use a glass shader for this behavior.
The Hide unconnected toggle is useful to reduce the size of node in the tree.
Glass Shader
This is internally the standard glass shader from Blender/Cycles. So not much to say here.
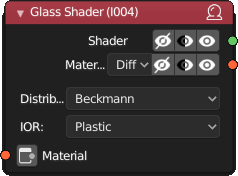
The IOR control is identical to the one described for the Principled shader.
You have to supply a material to control color and roughness for the glass, just plug an Material Composer here.
Notice that this information can be baked as well, if GlassMask is enabled on the Bakery node.
Emission Shader
Absolutely identical to Blender/Cycles emission shader.
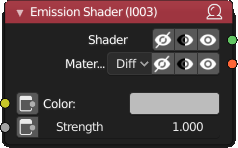
So nothing to describe here. Like the glass shader, this information can be baked. You have to enabled Emission on the Bakery node.
Translucent Shader
This is a more complex shader, it is not just an equivalent to Blender/Cycles translucent one.
This shader interally creates a whole translucent material, using Principled, Translucent, Transparent, Add, and Mix-shader like seen below. Use it, if you have for instance a Leaf or Grass PBR set. Just plug the matching Material from Textures to this shader.
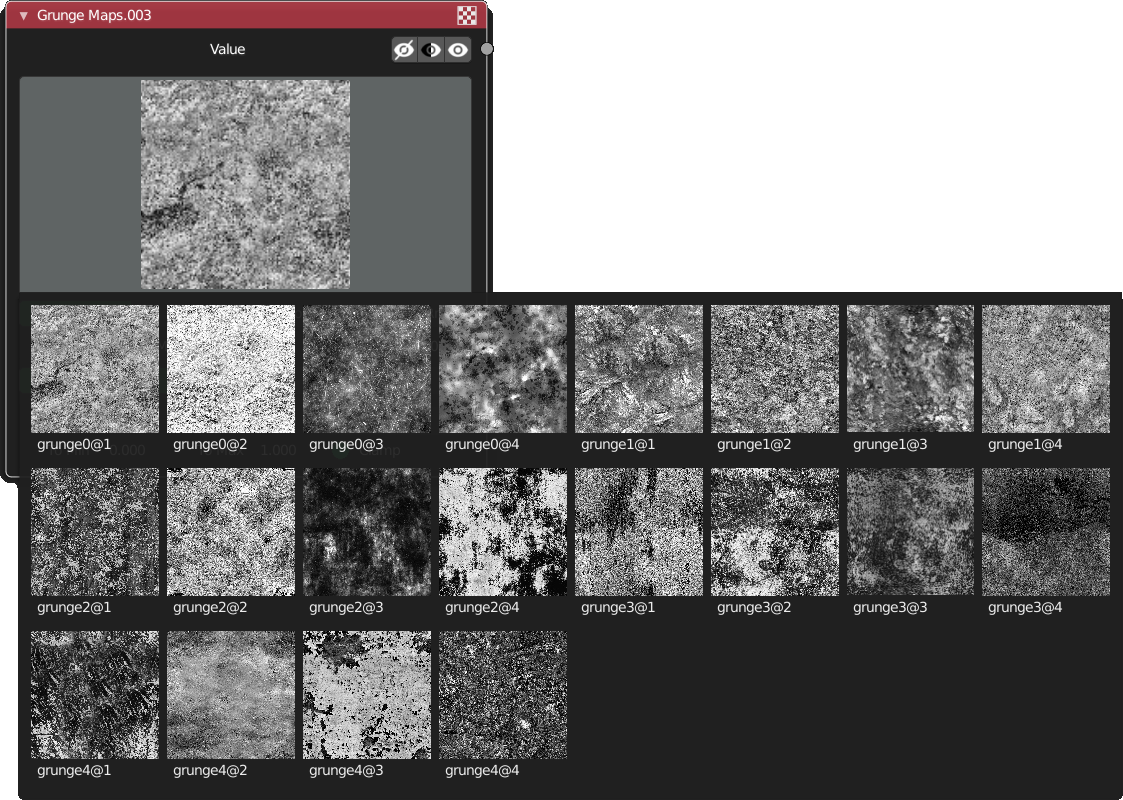
Grunge Maps
This node is an essential part of Material Wizard. As many real world material don’t look as clean as the textures in PBR sets, these maps can be used to affect different elements of a material, like saturation, value (HSV), roughness or the metallic channel. While noise textures are great, they often look some kind of synthetic or require a complicated, repetitive setup. Using grunge maps is quite easy. Select one that ships with the Addon and adjust it to your needs.
All grunge maps that ship with the Addon are packed, four maps in a single RGBA texture, to safe texture space (@0 to @3). So using one or more from one set just uses a single texture file.

The large image shows the texture that is used as base map. Clicking on it, allows to choose a different one.
Here are the maps that ship with Material Wizard.
Just below the selector, UV settings can be adjusted. Take a look into section Different UV map schemes for details.
Using a grunge map as is is very limited. So the node contains different controls to modify the gray values of the map in a very comfortable way. Just below the UV settings are controls to switch between Map Range, Color Ramp and Curve. Select one and adjust the node’s output to your needs.
Mask Generator
The Mask Generator is a powerful node to apply effects to materials in certain areas only or use it as mask to mix two different materials (using the Layer Manager).
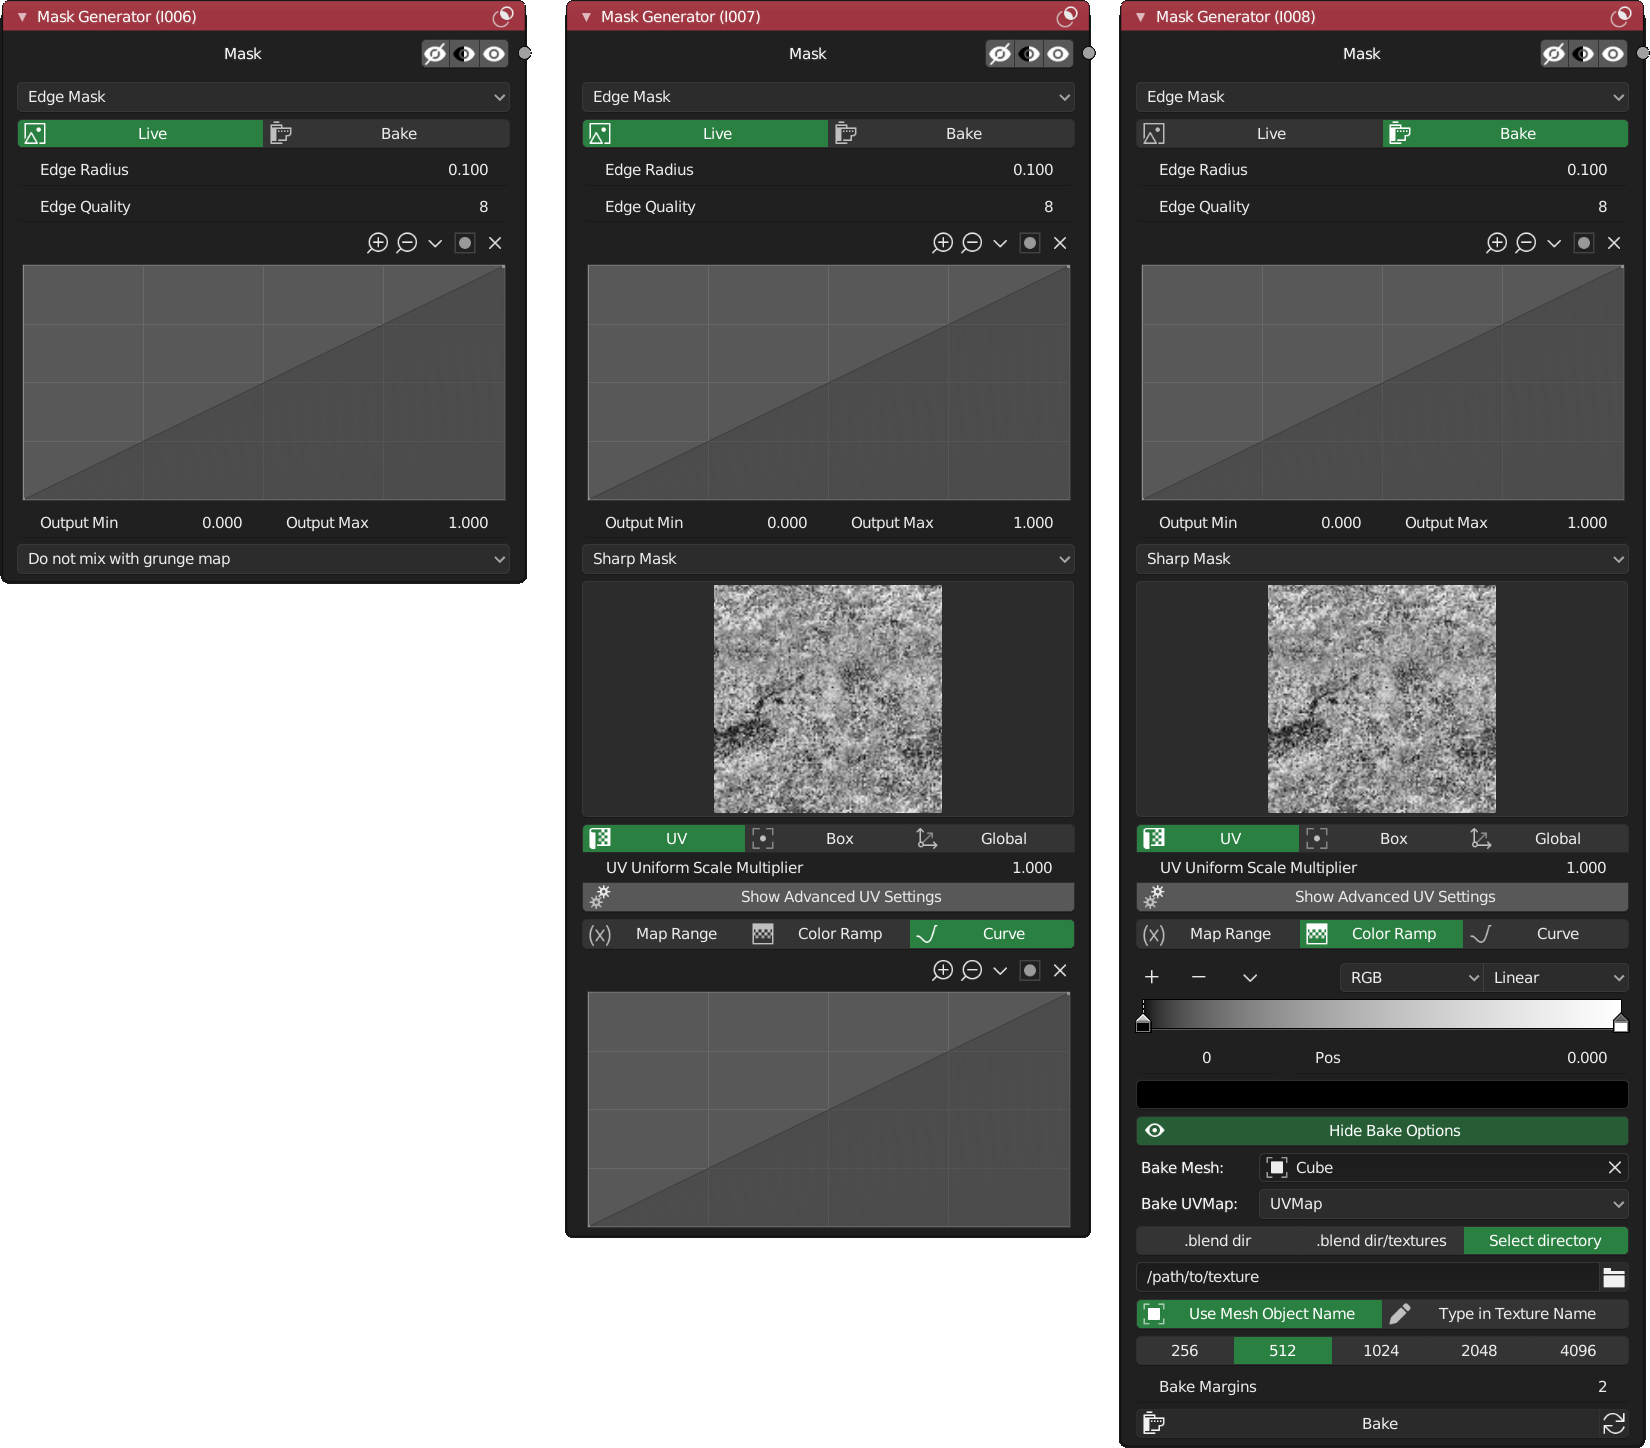
This node can be extended depending on your requirements. In the simplest form, a live calculated gradient is generated, which can be adjusted by the curve control. At the top, the kind of mask can be selected.
- Edge Mask: This mask is calculated using the bevel node. It only works well on hard edges and when using Cycles (in Blender 2.8). If the object has an active bevel modifier, results are not as expected. To use this mask in Eevee or if a bevel modifier is needed and for performance reasons (the bevel node is very expansive), use the bake option (see below).
- Ambient Occlusion: Very useful to create a mask for dirty areas. Has the same limitations as the Edge Mask: Cycles only and bad render performance, baking is preferred (see below).
- Object Height: Generates a gradient from bottom to top of object. This can be used to create a mask for instance to add dirt at the base of an object.
- Cover Area: Add dust to objects, make those areas wet or used, this mask will help.
Just below this selection is the Live/Bake toggle. In Live view, that mask is dynamic and will follow the modification of your object. Edge Mask and Ambient Occlusion will work in Cycles only. The primary intent of this option is to adjust the parameter for the last two mentioned masks, before baking it. Entering the Bake mode tries to find the baked maps as set in the bake options in the lower part of the node. If the map doesn’t exist, a placeholder texture is used.
Next to this toggle is the curve to adjust the generated gradient, very useful to shape the gradient. What follows are the Output Min/Output Max controls. These are the last values that control the value generated at the Mask socket. In some cases it is necessary to modify the intensity of the outgoing mask.
The following dropdown box chooses the post process to the mask gradient. If anything else than Do not mix with grunge map is chosen, the grunge part is added to the node. Options in this area are identical to Grunge Maps.
These are what all of the options mean:
- Sharp Mask: If the value of the grunge map is lower than the gradient value, the mask is 1.0, 0.0 otherwise.
- Sharp Mask – Negative: Same as Sharp Mask, but the inverse.
- Modulate: The gradient value is multiplied with the grunge map value.
- Modulate – Negative: Same as Modulate, but the gradient value is inverted before multiplied with the grunge value.
Just play around with these choices to get an idea what is useful.
In Bake mode, a toggle to show or hide the bake options is placed as next control, if it is enabled, the bake options show up.
Baking limits the reusability of the node on different objects. I’ve ideas to overcome this limit, but this will eventually a feature of future versions.
To bake a texture, the node must know several things. First of all the object for which the map is baked. Use the picker to select an object. If an object is selected, the UVMap to use for baking can be selected just below the picker. Make sure, that the selected UVMap does not have overlapping islands, otherwise the result is not as expected. Leave a small gap between the islands (margin), otherwise the mask may ‘bleed’ into unwanted areas.
The last options here are information about the generated image file:
Foremost the output folder:
- .blend: The texture is generated in the same folder were the .blend file is located
- .blend/textures: Identical to .blend, but creates a subfolder ‘textures’ and stores the map there
- Select directory: You can freely select an output directory just below the selector.
Regarding the first two options: The .blend must be saved, otherwise this won’t work.
Next one is the texture name. You can choose between the object name or enter the name on your own.
Be careful when choosing the first option, if you rename the option, the node doesn’t find the texture and the previously generated map wastes your HDD space.
Next is the size of the generated texture, which highly depends on mesh complexity and UVMap. Try to start with the lowest size and walk upwards. As larger as the texture size, baking time increases dramatically.
And finally are the bake margins. Choose a value that fits to your UVMap and texture size.
At the very bottom of the bake options is Bake button, which starts the bake process. After successful baking, click on Reload Bake Texture to see the result.
To safe texture space, Ambient Occlusion, Edge Mask and Object Height are baked to a single texture, in R, G and B channel respectively. So baking the Edge Mask, automatically bakes the other two masks as well. The file is than named ‘name’_grp0.png. The Object Cover mask is baked to the R channel of a texture named ‘name’_grp1.png. B and G channels are free for masks added in the future.
Image
While there’s Material from Textures, Grunge Maps and Mask Generator, a single texture can be useful for many things. A user made grunge or mask (this will be supported in Grunge Maps in upcoming versions), a texture painted mask channel, a decal texture or just a simple diffuse or bump map.

This node is really straightforward. Like the Image Texture Node in Blender, you can either create a New texture, so you can paint on it, Load one from your disk or select a texture already loaded in the current .blend file.
Than there are the same UV controls like on all other texture based nodes.Take a look into section Different UV map schemes for details.
On the very bottom are controls for repeat (useful for decals) and the color space. For diffuse maps, sRGB should be used, Non-Color for all effect and mask textures.
Layer Manager
This node can be compared to the Mix Shader node from Blender, but cascades them internally for simpler handling. The idea is to give you an experience like layers in 2D application work. At the bottom is the base layer and you are able to add as many layers as you want on top of each other, using masks to define the parts visible from each one.
Using too many layers will increase render time!

Usage is straight forward. If just the base layer is available, it is passed through to the output. For every added layer, a mix shader node is used to combine the result from the previous step with this layer using the mask below this layer. White areas define where the upper layer is visible, while black areas are where the result from the lower stages is show.
The controls next to each layer should be self explaining:
- Pen: This is a toggle. If enabled, the text “Shader Layer X” is hidden and a text input is visible, here you can enter a new for the layer.
- Up/Down Arrows: Move the layer up and down. Only the base layer can’t be moved. When moving the layer, the corresponding layer mask is moved as well.
- Plus: Add a new layer just above the current.
- x: Remove the layer and it’s mask.
Advanced Layer Manager
The advanced layer manager was introduced in v1.2. It is very similar to the basic Layer Manager, so most of the information belongs to it too. In comparison to it, the ALM mixes materials instead of shaders, which is required for baking (as well introduced in v1.2).
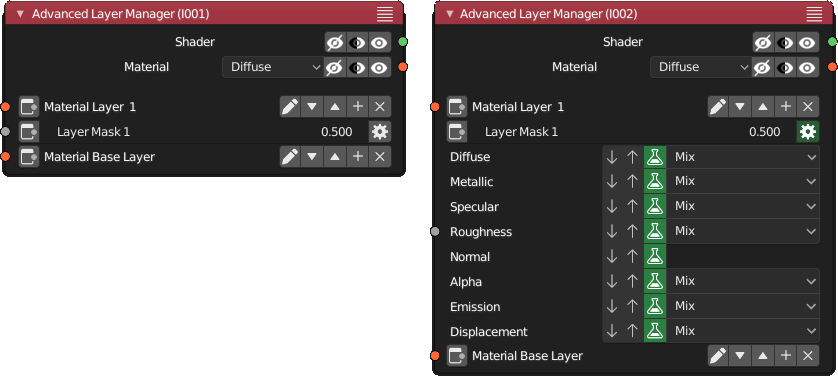
Note the little toggle at the right side of the mix factor. When enabled, mix options are shown (like in the right side of this image). Every layer mask has it’s own settings. Here you can adjust the settings for each material channel individually.
The three buttons in each line are as follows:
- Arrow down: Use channel info from lower layer, ignore all from the upper one.
- Arrow up: The opposite, data from the upper layer is used.
- Tube: Information from both layers are mixed, weighted by the layer mask. In this case, you can choose how to mix both channels in the drop down control right of the tube.
The normal channel has no mix control, both are just mixed.
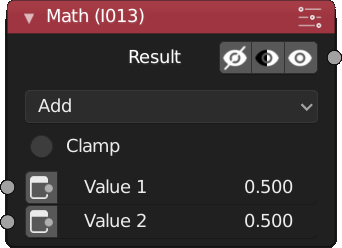
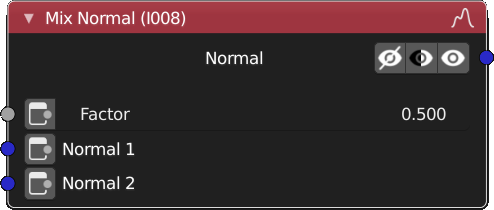
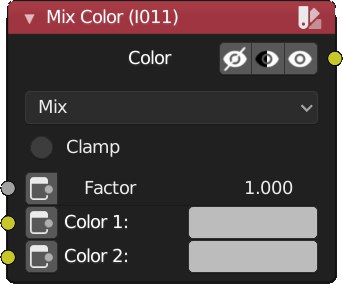
Mix Normal
There is Mix Color for colors and Math for scalar values, this node can be used to mix normal maps.
Bakery node
This node is used to bake materials onto an object.
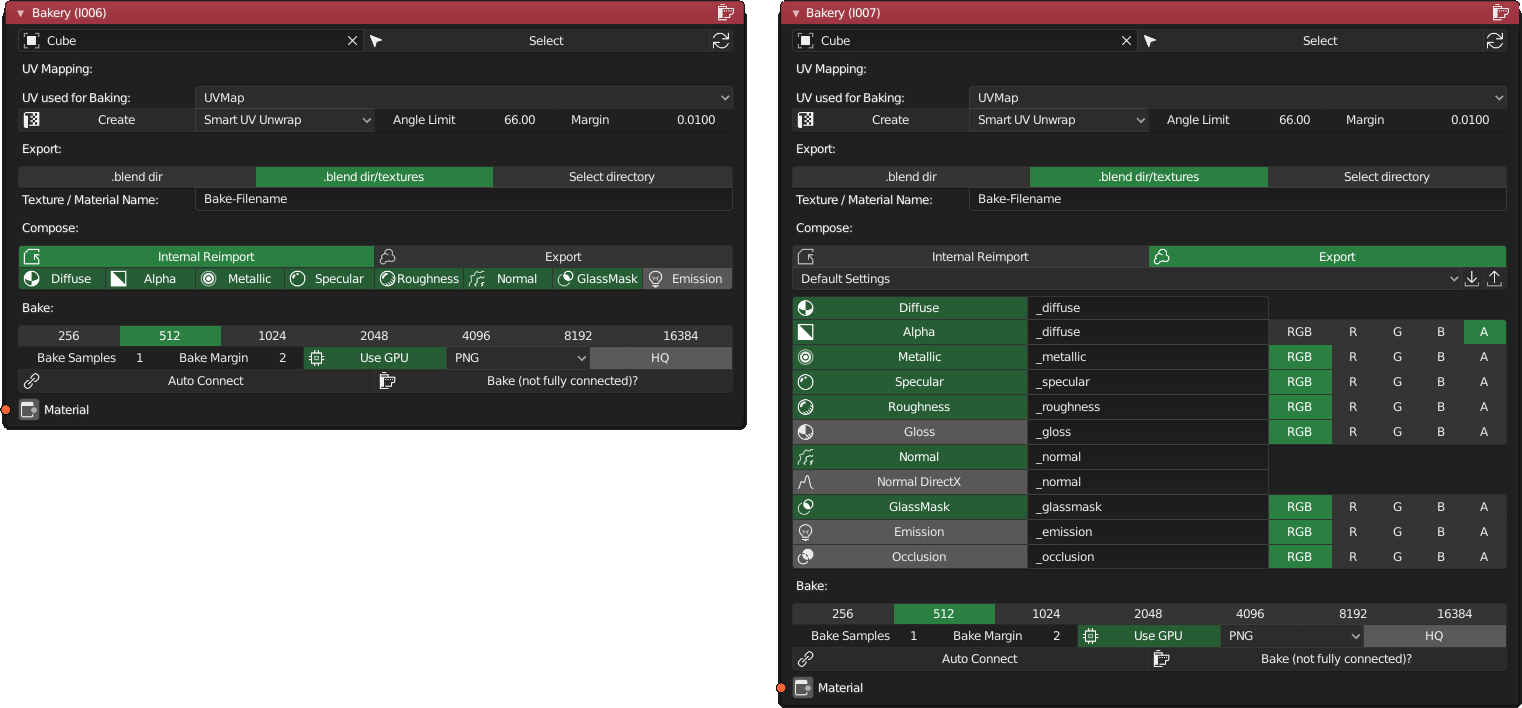
Top level row
After adding the node, it is very small. Select the object to bake with the leftmost control. The Select button next to it, select the object in the scene. You don’t have to click on it before baking, but this can be helpful. The Reload button right of select must be used, if you’ve added or renamed materials belonging to the object.
UV Mapping
After selecting an object, UV mapping controls are visible. Select the map to use for baking here. This map is than always used for baking.
If you don’t have one or need a different one, you can create one with the controls below it. Functionality is very limited here, either create one using Smart UV Unwrap or LightMap unwrap. The created map is automatically named UVBake. It is advised to verify this map and to space optimise it. Always recheck if you’ve selected this one, which is not done automatically! Select it after creation in the control above (if not automatically done).
Export settings
Following are the export options. They are very identical to the one on the Mask Generator node. The top row allows to set the output folder, either the .blend folder, the /textures subfolder to it or any other folder.
Below you have to enter the name of the textures to bake to. This name is used as well for the baked material when doing Internal Reimport.
Internal Reimport
If this is selected, the baked maps were used to create some kind of shadow material, a material that looks identical to yours, but just consists of a group of texture files, the baked images and not on the complex node tree used for your constructed material.
You have to select which material channels you would like to bake here, just use those you really need for this specific material.
After baking, a material with these maps is automatically generated (or updated if it already exists). You can use this material on a copy of your object. Be aware to use the UV map that was used for baking on this copy, otherwise the textures have a wrong mapping. This material works in Eevee, Cycles and AMD ProRender without any change. For use in LuxCoreRender, just click “Use Cycles Settings” in the material panel.
If you now do some modifications on you original material, just hit ‘Bake‘, so your copy is automatically updated.
Export
This is used to create maps for external applications, like Unity or Unreal. Close to the Export button is a dropdown control. Here you can select a preset to use. The button next to it loads this preset. You can see the change in to export matrix below. I’ve tried to find usable settings for Unity Specular/Metallic as well as Unreal. If you thinks there are better settings for those, please report it to me. If you like to see other presets, report it to me too, so I can add them in future releases.
In any case, you can fully configure which material channel it exported to which file in which channel, as well as enable or disable channels individually. The files are named [Texture Name][postfix].[ext], while the Texture Name is taken from the export settings section and postfix is used from the individual channels. The file extension is chosen from the export format automatically. When using the same postfix for different channels, please have attention to not use the same texture + channel twice! Diffuse and Normal are hard mapped to RGB.
If you enable Occlusion, settings for the used Ambient Occlusion node were shown just below it.
Bake
The first row here is the output texture resolution, choose one large enough to not loose to much detail, but don’t always use the largest one. I’ve tested 16k and I got really large files. One single 16k file requires 1 GB of memory when used in a render, so if you have a PBR set which contains three texture files of this size, this single object would need 3 GB of VRAM alone 🙂
Bake Samples: Samples number to use for bake. All channels are baked in ‘EMIT’ mode, so low numbers work very well here, which is good for fast bakes.
Bake Margin: You should now what this is, prevent a value of 0 here, otherwise you may get artefacts at UV island edges.
Use GPU: All baking is done using Cycles. If you use GPU for rendering, you should use it for baking as well.
Output format: PNG, TIFF or OpenEXR. Prefer PNG. It has good compression and is widely used. OpenEXR can be used to create maps with a higher range, which may sometimes be useful. For instance if you bake emission and the strength is larger than 1.0. But this creates large files!
HQ: If set, both PNG and TIFF files were created with 16bpp instead of 8bpp, for better detail. In case of OpenEXR full instead of half precision is used.
General Info
You can add as much instances of this node to you node tree. So every time you adjust a specific material, you can re-bake the textures by just clicking on the Bake button.
Nodes from Blenders shader editor
The nodes in this section are equivalent counterparts to nodes from Blenders shader editor (and use these nodes internally). So here are just links to the original descriptions.
HSV

Mix Color
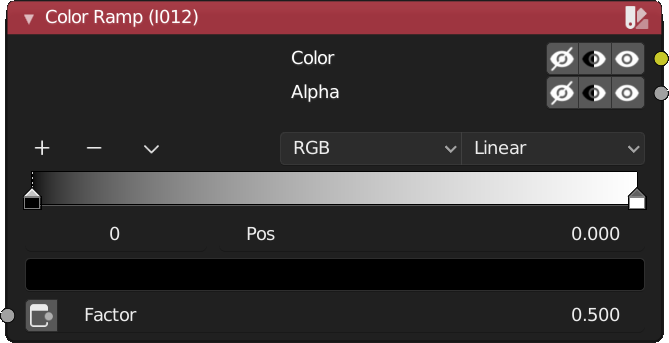
Color Ramp
Math